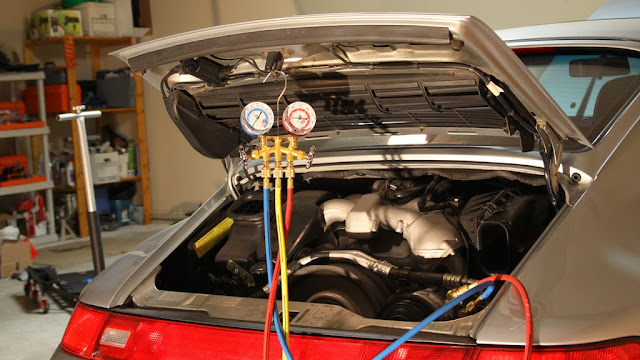
As mentioned in this previous post, Ella's AC compressor was suspected of leaking r-134a refrigerant and needed to be replaced. The repair quote from the mechanic was absolutely ridiculous, so I felt free to buy tools and equipment as well as the parts. :-D
For an excellent how-to article, check-out http://www.pcarworkshop.com/index.php/993_-_A/C_Evaporator_Replace. Although the title says "evaporator" replace, it also covers the compressor and the receiver/dryer. Rather than re-create the DIY here, I made a few small contributions to the article on pcarworkshop. Ella even makes a cameo appearance!
In this post, I will cover some of the special circumstances and considerations from my install.
I had had enough fun with fasteners at this point, but Ella had a surprise waiting for me (at least as far as a corroded bolt on a 17-year old car can be a surprise). I had left the old receiver/dryer installed as long as possible to limit the number of places moisture could enter the system. After installing the compressor, I removed the receiver/dryer to find the bolts holding the receiver dryer in poor shape. Having planned on finishing that evening, I commenced cursing. Cursing done, I headed inside to find the specs for the screw. Turns out that it is missing from the 993 parts diagrams, but fortunately the same receiver/drier and associated bits were used in other Porsches. The 968 parts catalog listed this screw as 99907504802, an M6x22 combination screw. As before, the extra 2mm length indicates a taper.
Knowing that I would never find an exact match locally on a Sunday night, I rushed off to Lowe's to find a substitute. I came home with M6x20mm stainless steel screws (in this case, the taper is useful and next time I would order the Porsche OEM part). [Update: since doing this work, I have learned that stainless steel and aluminum may exhibit galvanic corrosion when in contact with each other, so don't use stainless steel bolts.]
For an excellent how-to article, check-out http://www.pcarworkshop.com/index.php/993_-_A/C_Evaporator_Replace. Although the title says "evaporator" replace, it also covers the compressor and the receiver/dryer. Rather than re-create the DIY here, I made a few small contributions to the article on pcarworkshop. Ella even makes a cameo appearance!
In this post, I will cover some of the special circumstances and considerations from my install.
Parts and Tools
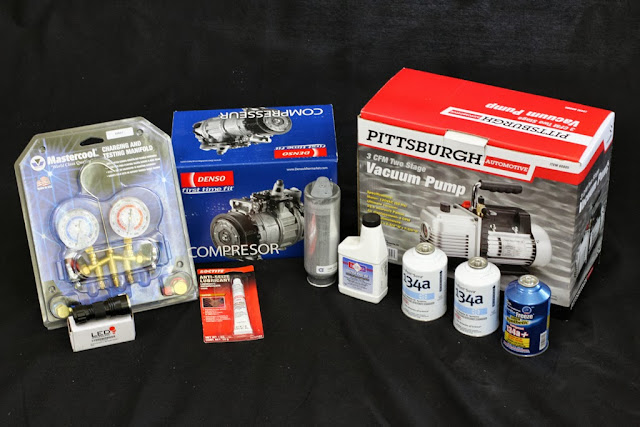 |
| Porsche 993 AC Compressor Replacement Parts, Supplies and Tools |
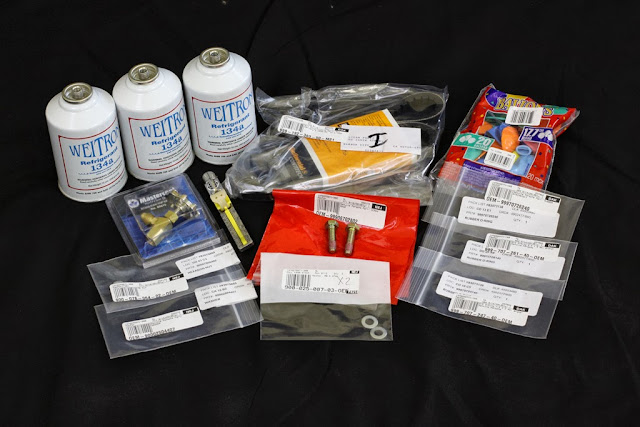 |
| Porsche 993 AC Compressor Replacement Parts, Supplies and Tools |
Fun with Fasteners
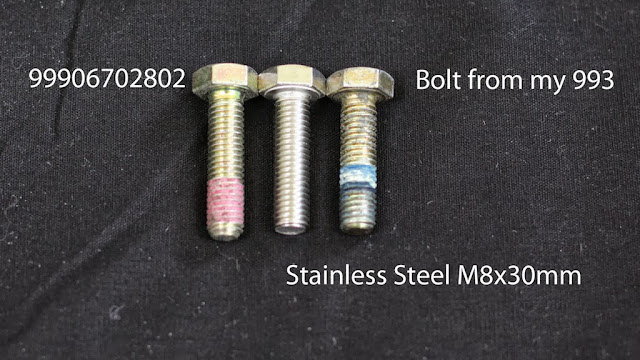
It was recommended to change the two bolts (PN 99906702802) holding the AC hoses to the compressor when doing the compressor install. I placed an order with Pelican for them, despite the $10 apiece price. Yes, I find $10 ridiculous for a yellow-zinc plated metric bolt, even if the thread-lock is pre-applied. But in the big picture, $20 for a couple of bolts is a drop in the bucket. Then they turned out to be back-ordered and might not reach me in time for my target install date.
In the meantime, I had actually removed the compressor and discovered that the last time this job had been done (not by me), the bolts had been replaced by standard yellow-zinc M8x30mm bolts. I stopped by a few local shops looking for stainless steel M8x30mm bolts, and eventually found them at Lowe's, which surprisingly seems to be the best source for stainless steel metric hardware in my area. [Update: since doing this work, I have learned that stainless steel and aluminum may exhibit galvanic corrosion when in contact with each other, so don't use stainless steel bolts.]
In the end, the OEM bolts arrived the day before the planned install. Here's a shot of the three bolts. The Porsche part is described as M8x32mm with the extra 2mm being a taper on the end of the bolt. In the end, I chose to install the OEM part.
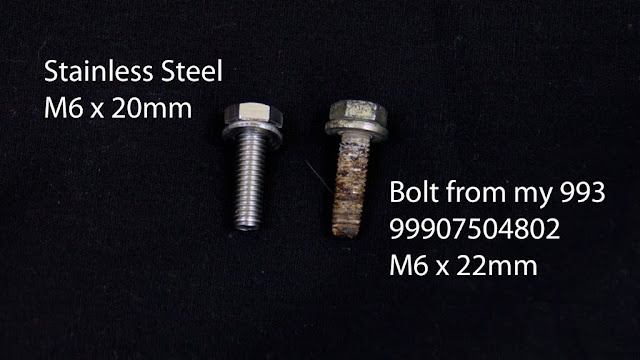
I had had enough fun with fasteners at this point, but Ella had a surprise waiting for me (at least as far as a corroded bolt on a 17-year old car can be a surprise). I had left the old receiver/dryer installed as long as possible to limit the number of places moisture could enter the system. After installing the compressor, I removed the receiver/dryer to find the bolts holding the receiver dryer in poor shape. Having planned on finishing that evening, I commenced cursing. Cursing done, I headed inside to find the specs for the screw. Turns out that it is missing from the 993 parts diagrams, but fortunately the same receiver/drier and associated bits were used in other Porsches. The 968 parts catalog listed this screw as 99907504802, an M6x22 combination screw. As before, the extra 2mm length indicates a taper.
Knowing that I would never find an exact match locally on a Sunday night, I rushed off to Lowe's to find a substitute. I came home with M6x20mm stainless steel screws (in this case, the taper is useful and next time I would order the Porsche OEM part). [Update: since doing this work, I have learned that stainless steel and aluminum may exhibit galvanic corrosion when in contact with each other, so don't use stainless steel bolts.]
Receiver/Dryer (aka Desiccator)
Installing the receiver/dryer is covered on the pcarworkshop how-to, but I have a couple thoughts. When tightening the screws into the top of the receiver/dryer to attach the hoses, be very gentle. Even carefully tightening the screws by hand with a short (4") handled socket wrench, I stripped the threads on the receiver/dryer (doh!). I didn't find the torque spec (although afterwards I think I saw it somewhere), but it wouldn't have mattered as I didn't have a small enough torque wrench to fit in the working space.
Good news is that the local AutoZone, open until 10pm even on a Sunday, stocks the receiver/dryer so I was able to grab a replacement and still get the job done that night.
Also, assembling the receiver/dryer into the car, at least as I did it, requires blindly lining up the hose fitting and the receiver/dryer and threading the screw (part #99907504802) through both. In this case, I think the taper at the end of the Porsche OEM part would be a big help, but after 20min of "persistence", I made the subsitute M6x20mm bolt from Lowe's work.
AC Compressor Bracket
When I removed the old AC compressor, the bracket/mount holding it broke. I had actually been warned by a fellow rennlister that this happened to him, but we both thought it likely that he just had bad luck. Now maybe it seems a more common problem, so I decided to give that repair it's own post here.
One of the four nuts used to mount the AC compressor to the bracket is impossible to hold in place by hand. Fortunately it is magnetic. I used a magnetic pick-up tool and strong black magnet at the end of that to create a holder. Definitely not the most robust "tool" ever, but it got the job done.
AC Compressor Belt
I figured as long as I had to take off the AC compressor belt, I might as well replace it, so I ordered the standard part number 999-192-363-50-M21 (13 x 1085). As far as I can tell, it is impossible to get this size on. Upon examination, the existing belt proved to be one size larger and I just re-installed it. I later read that many people find the larger size is necessary.
Like all my car projects, this one would not have been possible without the awesome support of the 993 community. Here are a few key links I used.


will, great article. Now that you have the AC gauges and tools, I'll let you do my M35 H.
ReplyDeleteBill
Many thanks for the play-by-play. It is a nice confidence booster. The devil is in the details !
ReplyDeleteGlad it helped. There has been some discussion on the AC belt as well. I made a post about that as well recently (http://twofourthsfull.blogspot.com/2015/03/porsche-993-ac-belt-size.html)
DeleteGreat article. Thanks for posting. Let me ask a strange question - assuming you tried charging the system when the compressor was bad - did you ever experience an acrid, tangy odor from the exhaust? My system will hold a vacuum, and will hold a low static pressure for weeks. But when charging with the compressor running, it leaks down rapidly. I suspect the compressor seal, leaking R134a directly into the adjacent air intake box as fast as I can charge the bottles. Source of the 'acrid' odor? Sort of unique to this 911 configuration, and I haven't seen this ever mentioned in other blogs. And the MSDS lists several 'toxic/corrosive byproducts from oxidation.' Great.
ReplyDeleteI took the mechanic's word that my compressor was bad, and replaced it before trying to recharge so I was never in a position to observe this. From what I've read, the r-134a is odorless, but there is PAG oil mixed in with it that may have an odor. Not sure what combustion in the engine would do to the smell. Another possibility given the location of the compressor right next to the cooling fan, is that the fan could be sucking the r-134a+PAG in and pushing it across the engine and out the bottom of the engine bay near the exhaust.
Delete